The MAP Statement
The MAP statement is a commonly used feature on the platform that allows for various operations within the Syncloop workspace. This documentation aims to provide a comprehensive understanding of the MAP statement and its functionalities.
Creating a MAP Statement
To create a MAP statement, right-click on the control flow section and select MAP from the context menu strip. The MAP statement will be generated in the control flow section of the Syncloop workspace.
A MAP statement is used in the Syncloop workspace for conducting the following operations.
Creating a new variable and assigning a value to it.
If the variable is already created, you can drop it in the next step.
It is used to map two variables.
Custom Configuration Mapping

Creating a New Variable
To create a new variable, you can utilize the MAP statement.
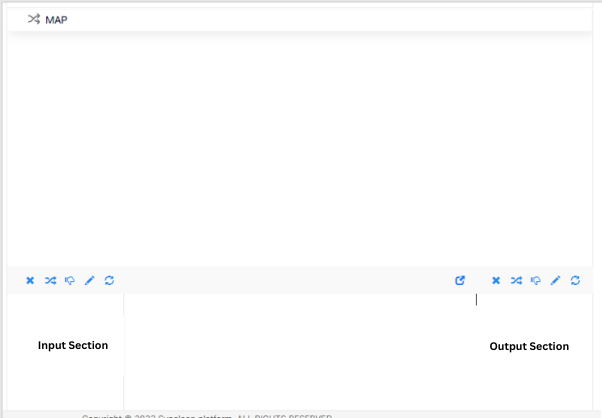
Simply click on it to access the input and output section of the map statement.
In the response section, right-click and choose the option to create a new variable. Select the data type to create any variable type within the Output section.
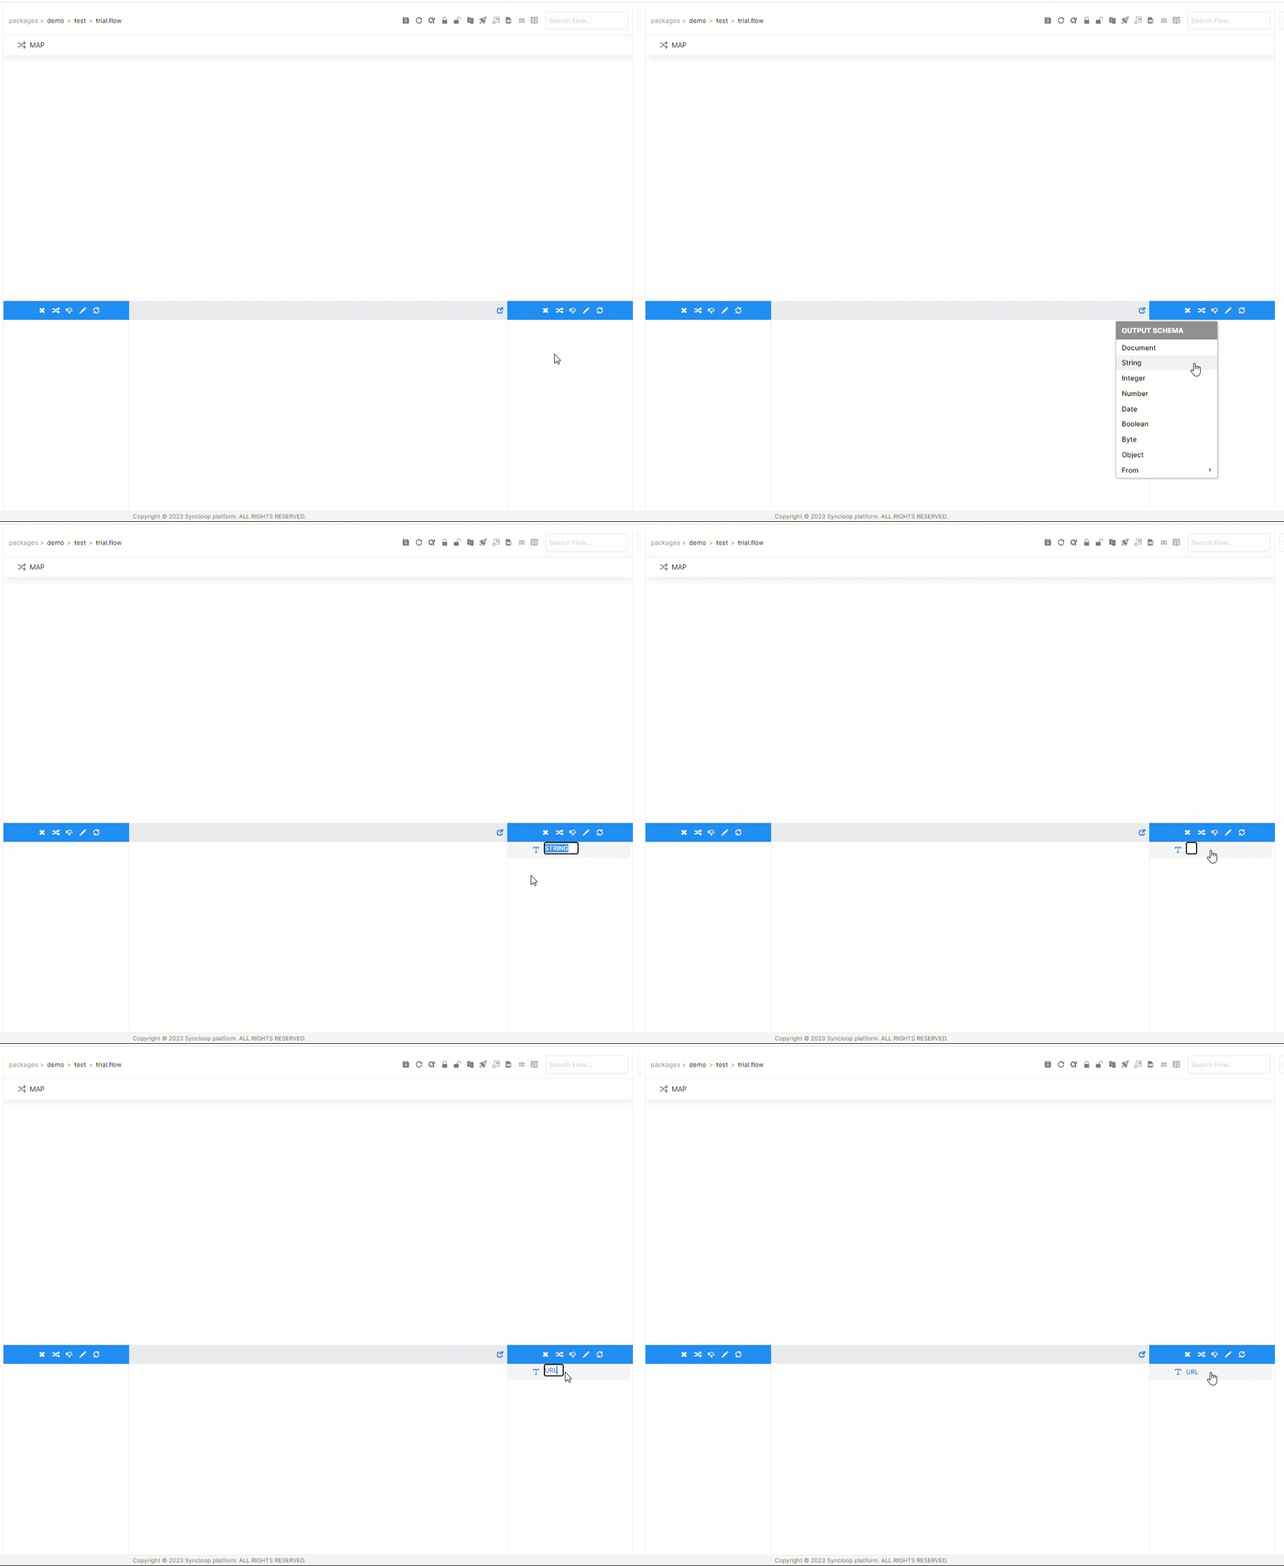
Operations Performed on Variables
The tools available in the Input and Output sections of the workspace are shown below:

To assign a value to the string variable test click on the pencil icon in the toolbar and assign a value Blank to it.
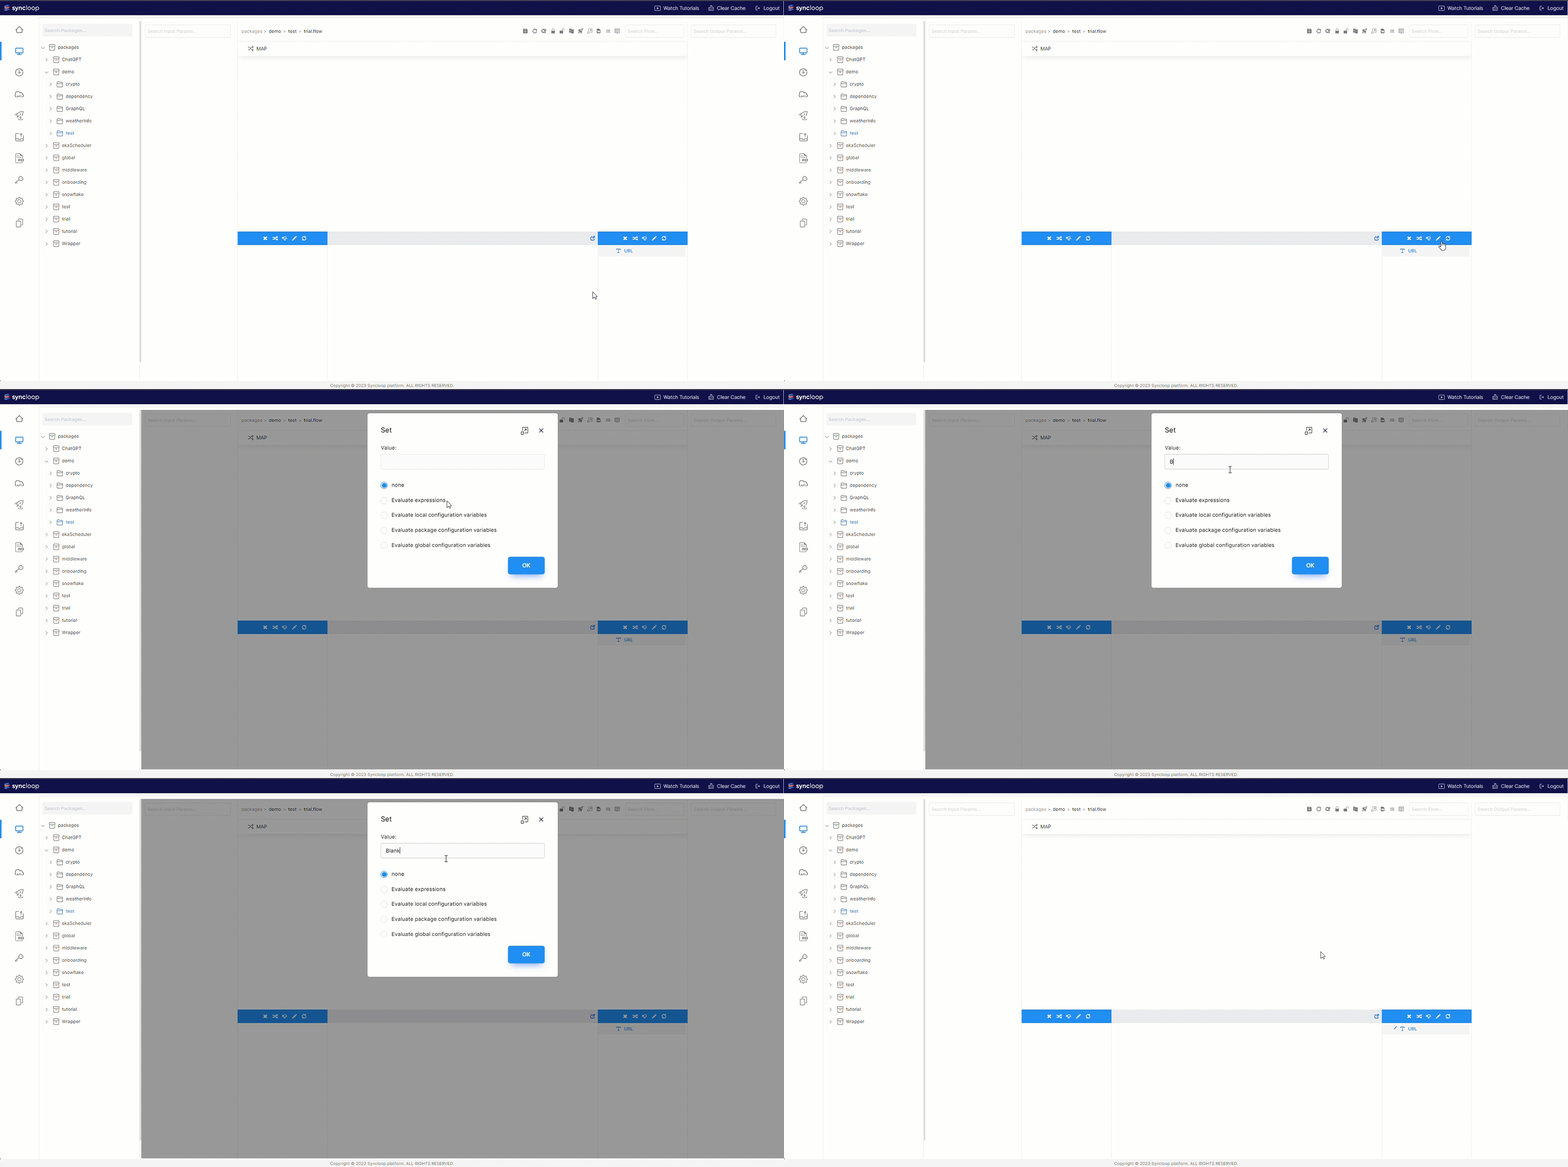
Let's discuss all the options provided in the Set Dialog:
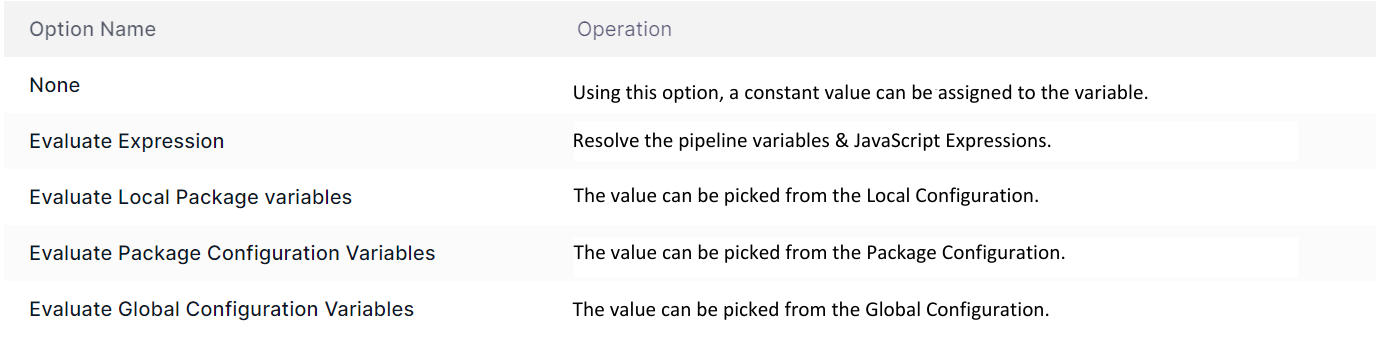
Video Links can also be provided here that have been already created for these options.
Once the value is assigned to the variable a pencil sign is visible with the variable name

Multiple MAP Statements
In addition to creating a single MAP statement, it is also possible to create multiple MAP statements and access variables that were created in previous statements. It is even possible to drop variables that have already been created in earlier MAP statements.
To demonstrate this capability, let's consider an example where we have multiple MAP statements. When we select a different MAP statement that was recently created, the pencil icon associated with the variable is no longer visible. Additionally, we notice that the variable "test" is repeated in both the request and response sections of this subsequent map.

This indicates that the variable is not created within the current MAP statement. Each MAP statement represents a distinct step in the service flow. If we want to eliminate the need for the variable in subsequent steps, we can choose to drop it.
To drop the variable "test," select the variable and click on the drop tool located in the response section.
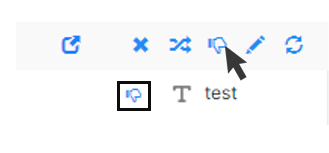
Once a variable is dropped, it cannot be referenced in any subsequent MAP statements.
Now, when we create a new MAP statement, we observe that the variable "test" is not repeated in either the request or response sections. This is because it was dropped in the previous step, effectively removing it from the service flow.

Mapping two Variables
This step is crucial for propagating variable values within the platform. To create a new variable called test2, follow the instructions below:
Locate the second MAP statement.
In the Request section, find the variable named test.
Click and drag the test variable to map it with the test2 variable in the Response section.
By performing this mapping, the value of the test variable will be assigned to the newly created string variable test2.
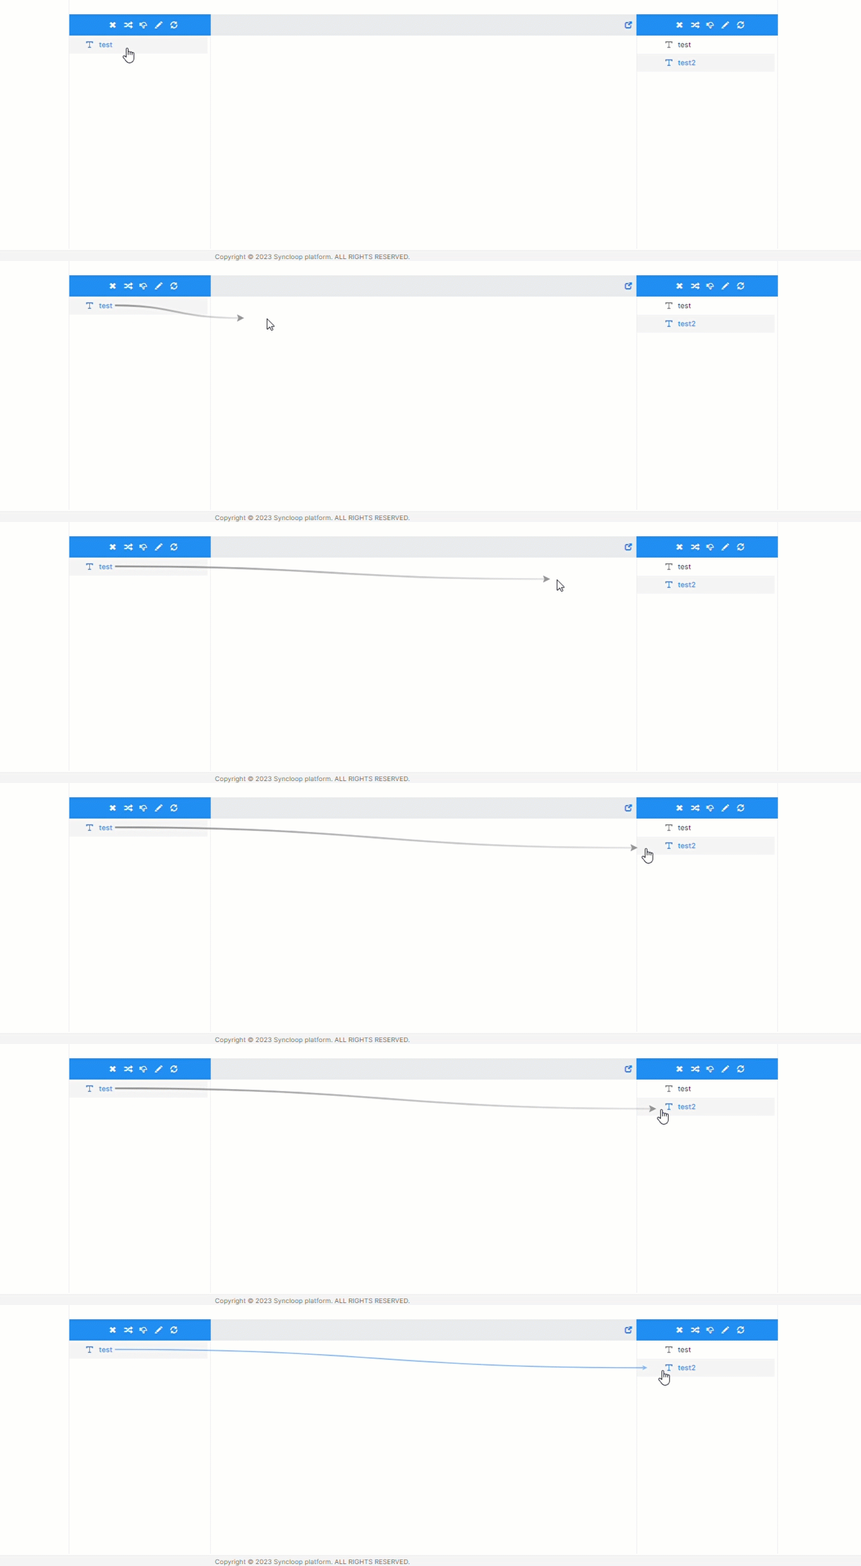
The mapping operation can be represented programmatically as follows:
test2 = test
Custom Mapping Configuration
The Custom Mapping Configuration option is used to customize the mapping between two variables. This feature allows for the modification of existing mappings according to specific requirements. To illustrate this, let's create an example using the API CustomMapping.
Follow the steps below to implement custom mapping:
Create a MAP statement in the workspace.
In the Response Section, define an integer variable called "intA" with the value 10.
Create another map in the workspace and define a variable named "intB".
Set "intB" as the output parameter.
Click on another map and map "intA" and "intB" as shown:

At this point, we have two variables, "intA" and "intB", which will be involved in this mapping process.
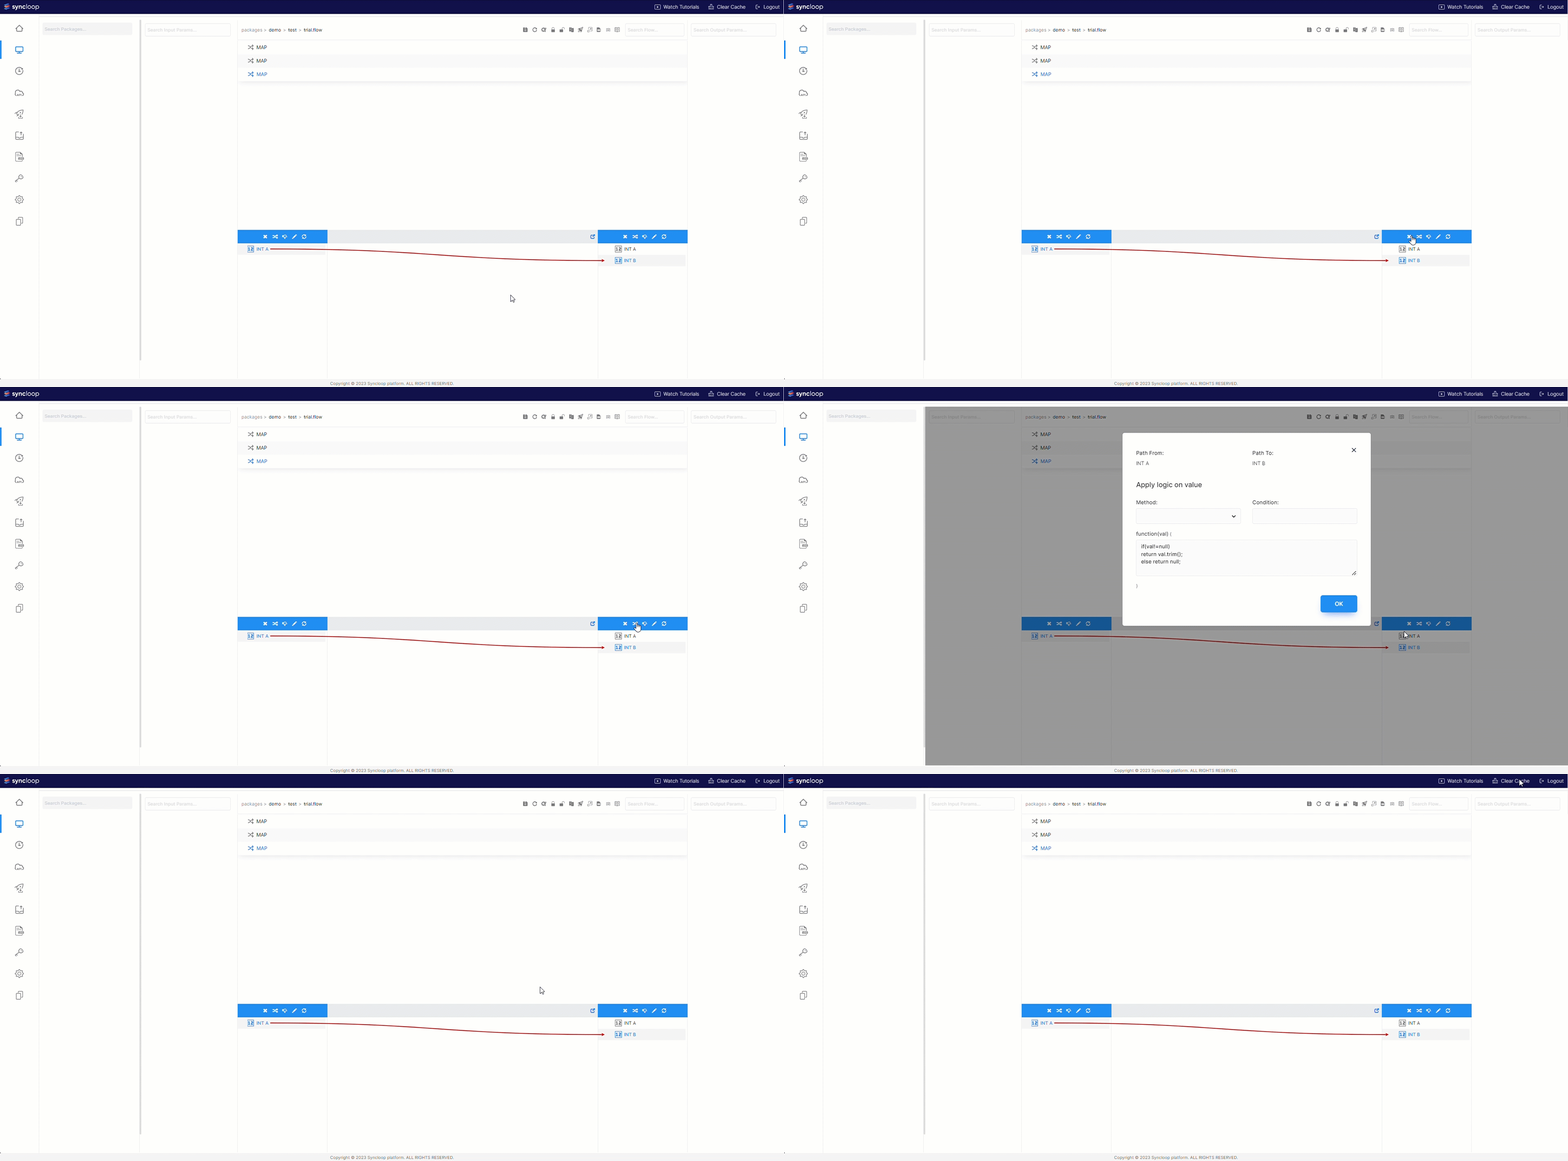
To enable custom mapping, the desired mapping line needs to be selected. Click on either end of the line until it turns red, indicating that it has been selected.

Once the line is selected, locate and click the "Custom Mapping Configuration" tool in the toolbar. This action will open a dialog box specifically for custom mapping configuration.
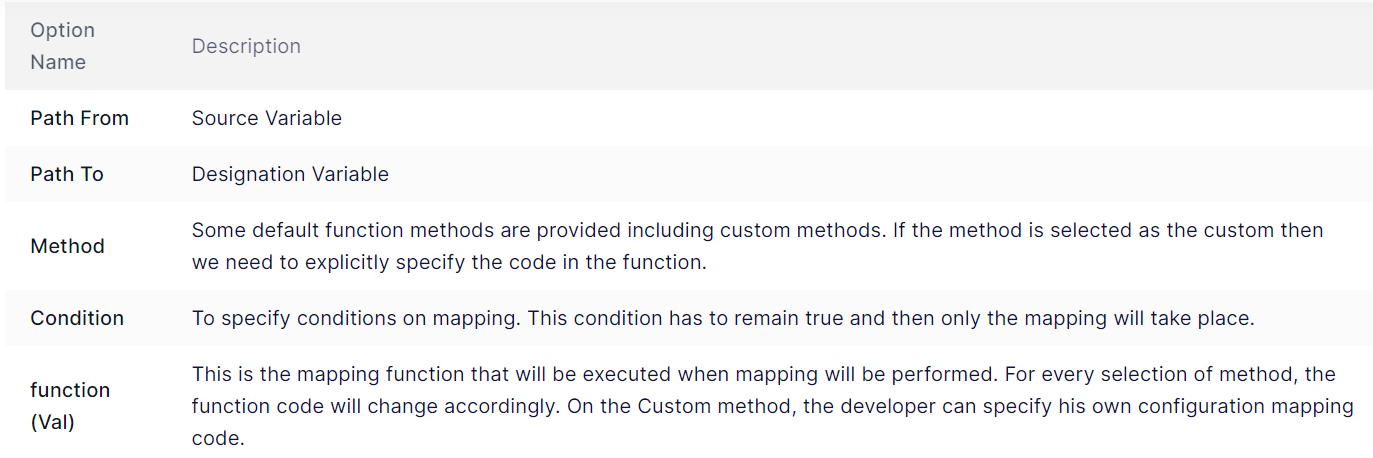
The various options provided in the dialog are explained in the table below:
To configure custom mapping, follow these steps:
- Select the method as "custom" and write the code in the
function(val)section.
function(val) {
val = val + 10;
return val;
 }
By default, the
intAvariable is assigned a value of 10. When the mapping is executed, the value ofintAwill pass through thevalvariable. Therefore,intBwill be assigned a value of 20, asval = 10 + 10 = 20.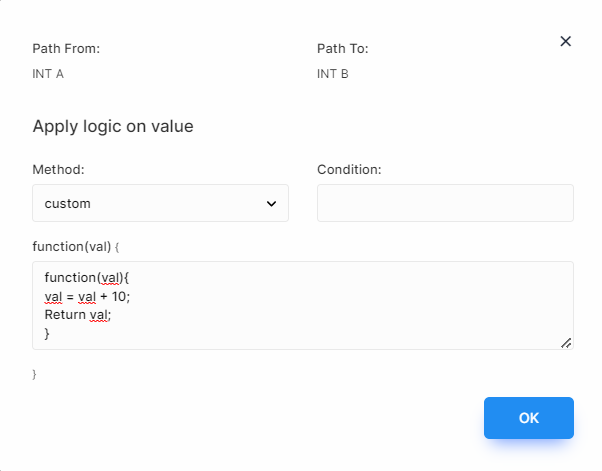
Execute the Service Endpoint on the browser to see the result.
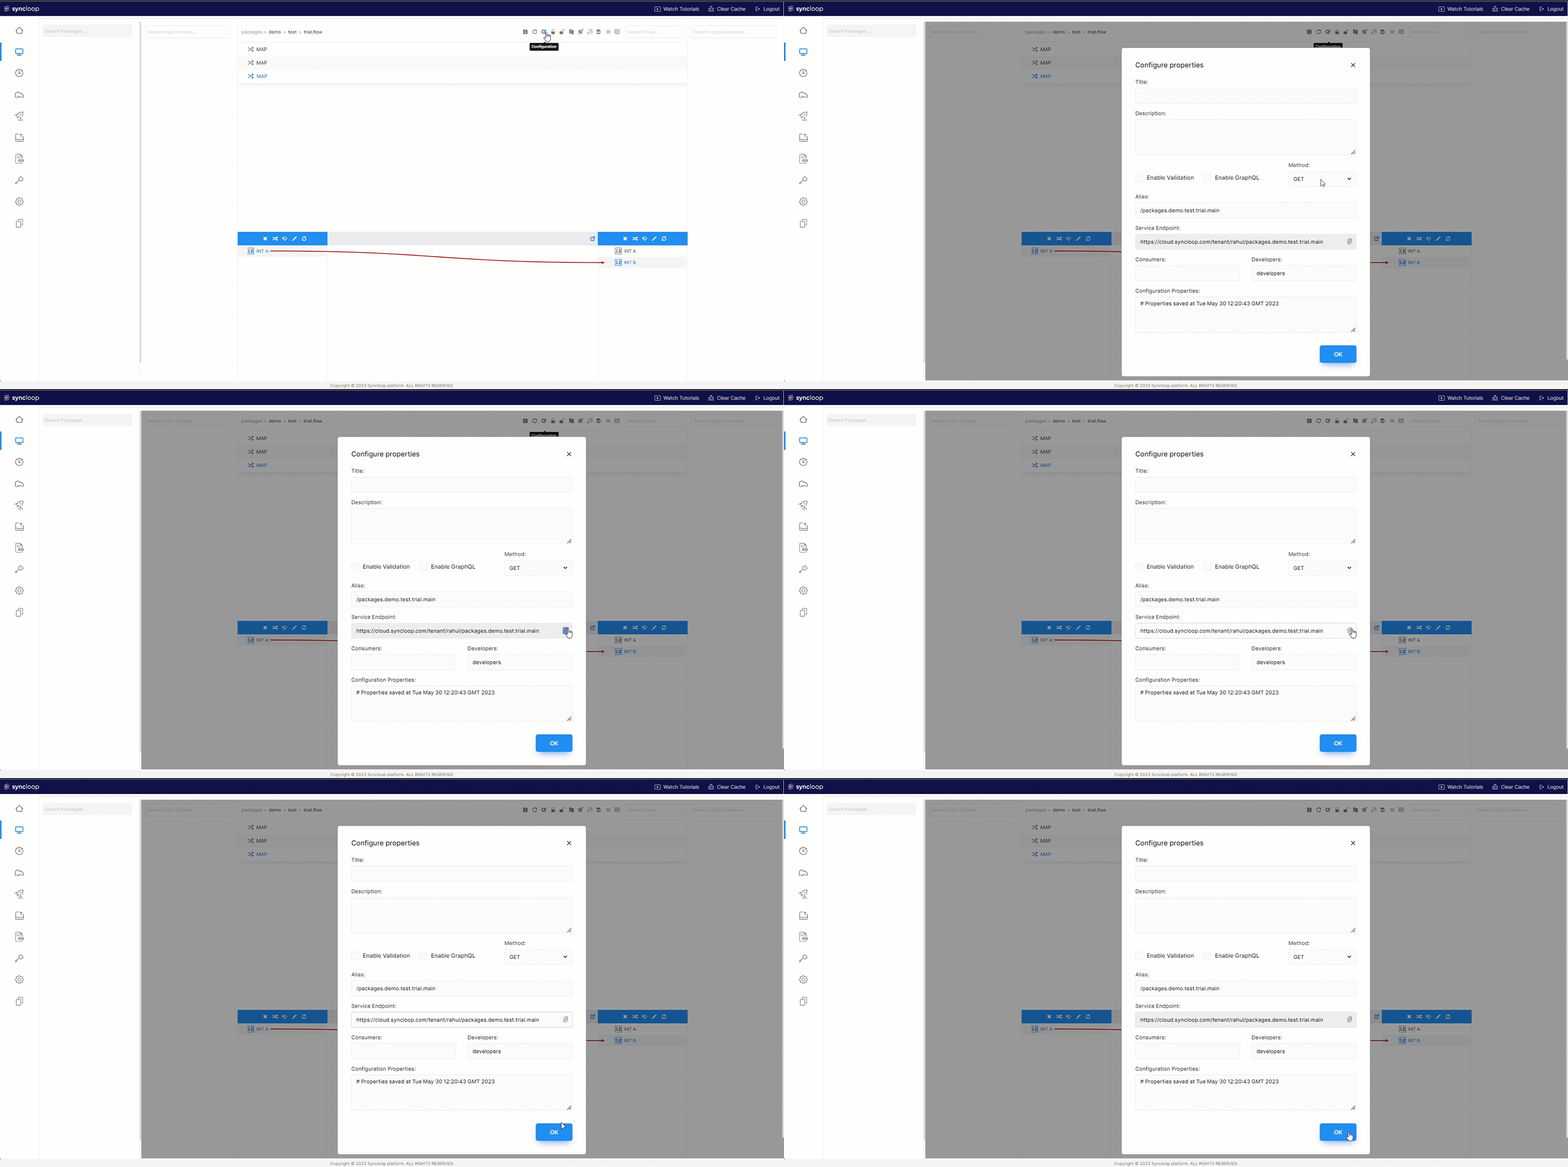
Result:

To modify the service and add an input value to the variable intA, follow these steps:
Create an integer input parameter named
intInput.Inside the function, write the code as shown in the figure.
val = val + $(intinput);
return val;

After modifying the service, save the project and test the code using the Postman application.
For example, if the input value is 200, the mapping will add the value of 10 to the input value, resulting in intB = 210.

Please note that if the condition option of Custom Configuration Mapping is set to false, the mapping will not take place, and it will result in an error in this case.
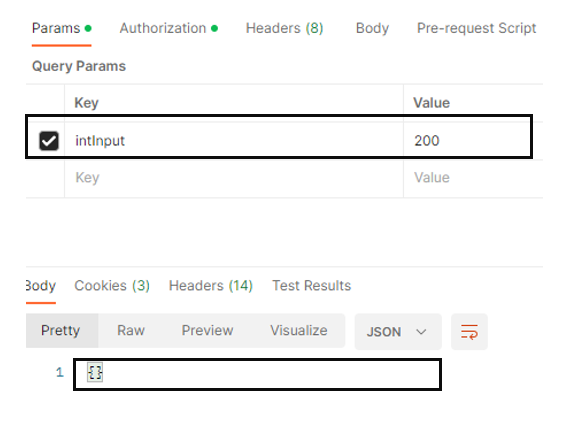
To implement the Custom Configuration Mapping feature successfully, ensure that the condition remains true.