Syncloop - GraphQL Use Case
This documentation provides a guide on how to use Syncloop's GraphQL interface to interact with the Syncloop platform.
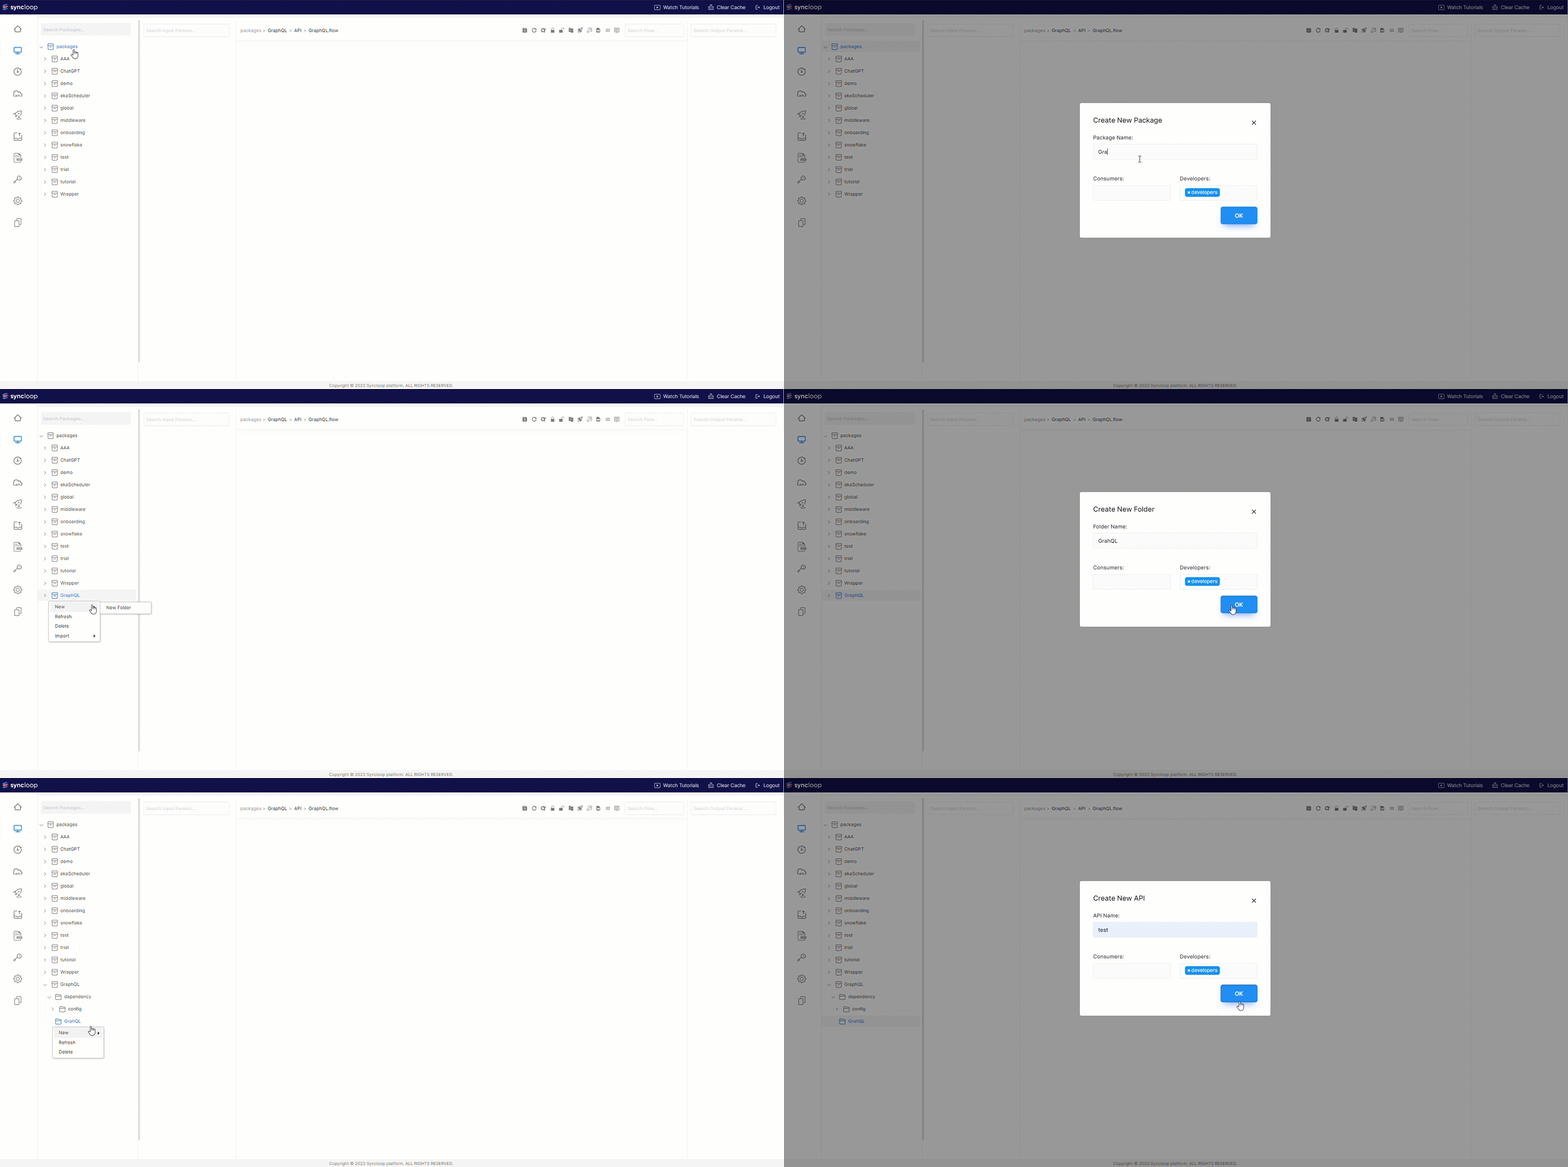
To create an API, follow these steps:
Right-click on the "Packages" directory ↦ New ↦ Packages.
Create a new folder under Packages and name it GraphQL.
Within the GraphQL folder, select Services ↦ API.
Creating a MAP
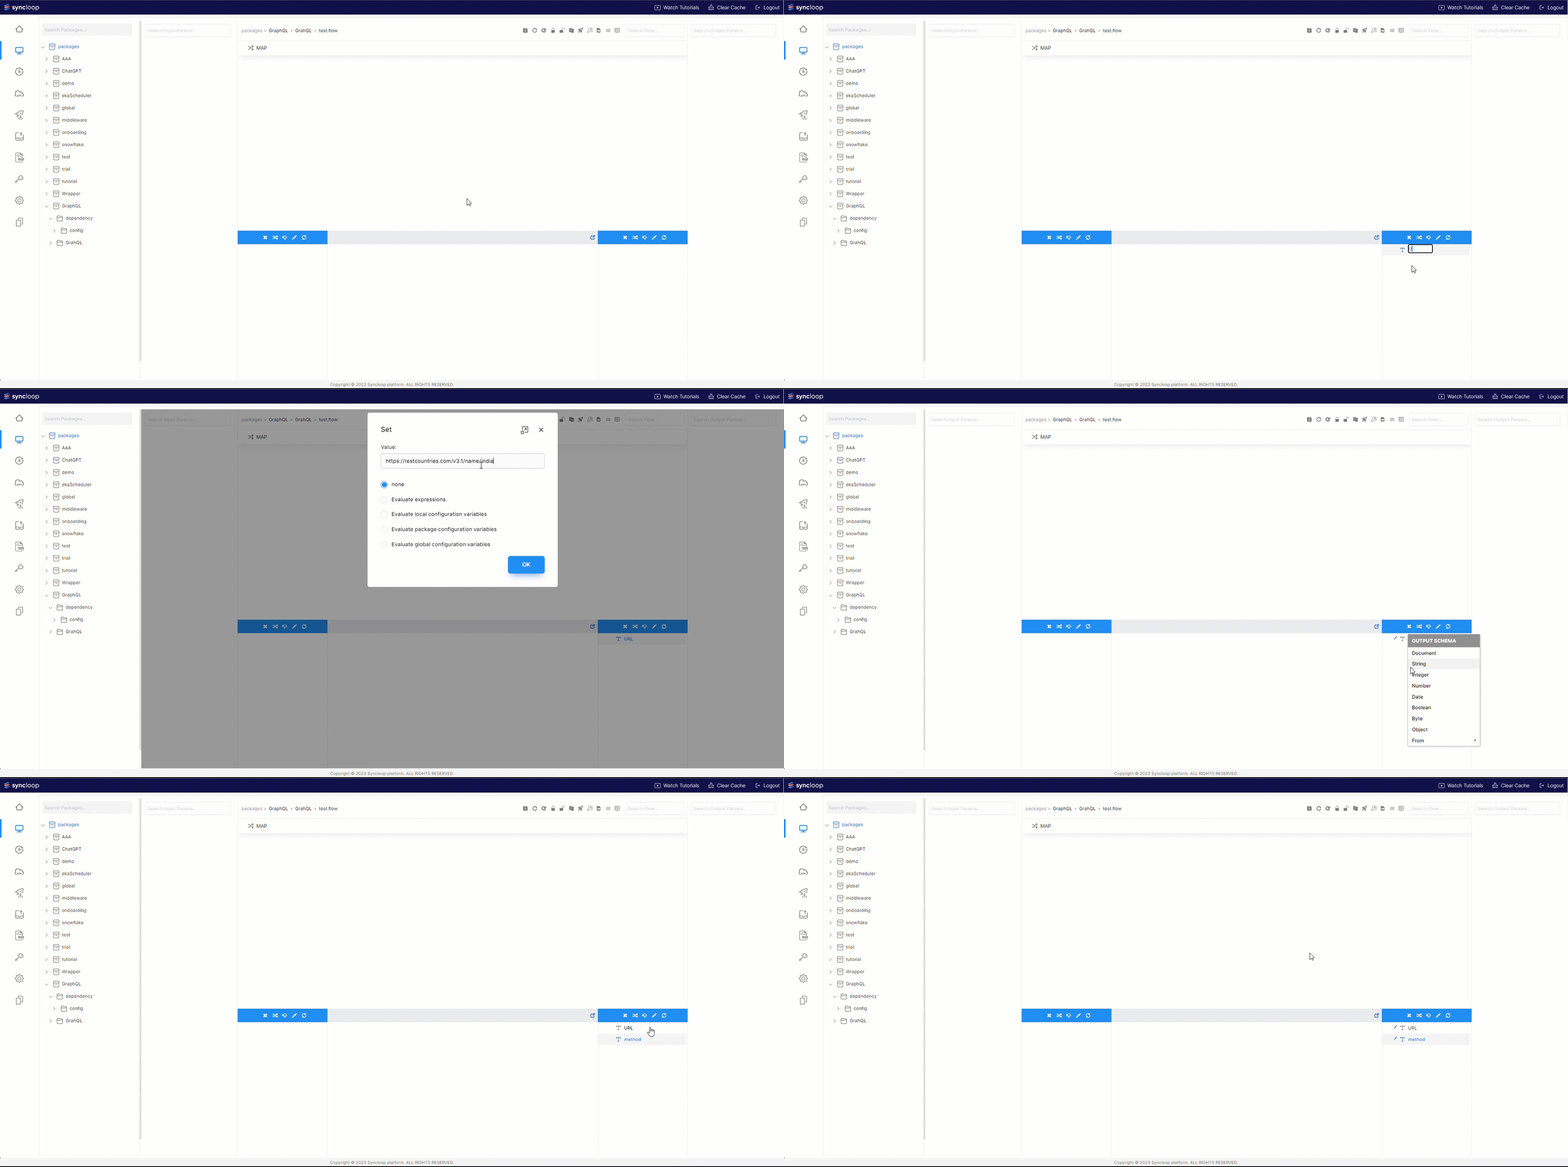
To create a MAP, follow these steps:
- Navigate to the Workspace ↦ Right-click within the Workspace.
From the context menu that appears, select the option labeled Map.

Output Schema
To define the output schema, we need to create two string values: URL and method.
URL: The URL should be set to the external API URL from which we intend to retrieve data. As an example for this tutorial, we will use "https://restcountries.com/v3.1/name/india" as the URL.
Method: The method value should be set to "GET" to specify the type of request we will be making to the API.
Creating an HTTP Request Service
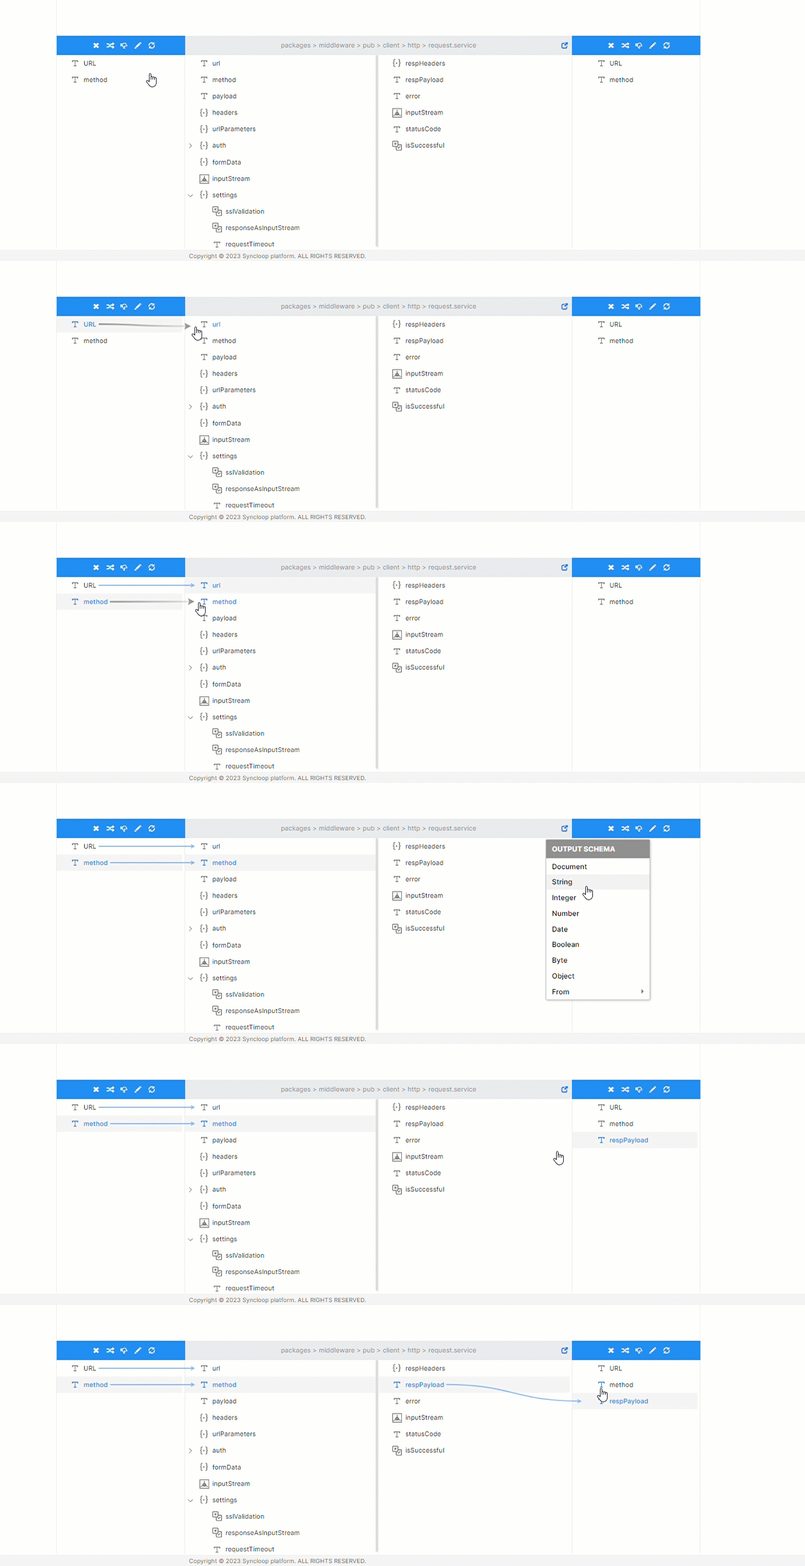
To create a new HTTP Request Service, follow these steps:
Right-click in the workspace and select Service from the context menu.
Navigate to the Packages section and search "request" and select it.

Mapping the Request Service
Map the URL to the
urlfield and the method to themethodfield.In the output schema, create a
respPayload(response) field. Please ensure that you map the desired response payload to this existingrespPayloadfield.
By following these guidelines, you can accurately define the URL and method in the API request, as well as map the desired response payload to the existing respPayload the field in the output schema.
Creating a fromJson Service
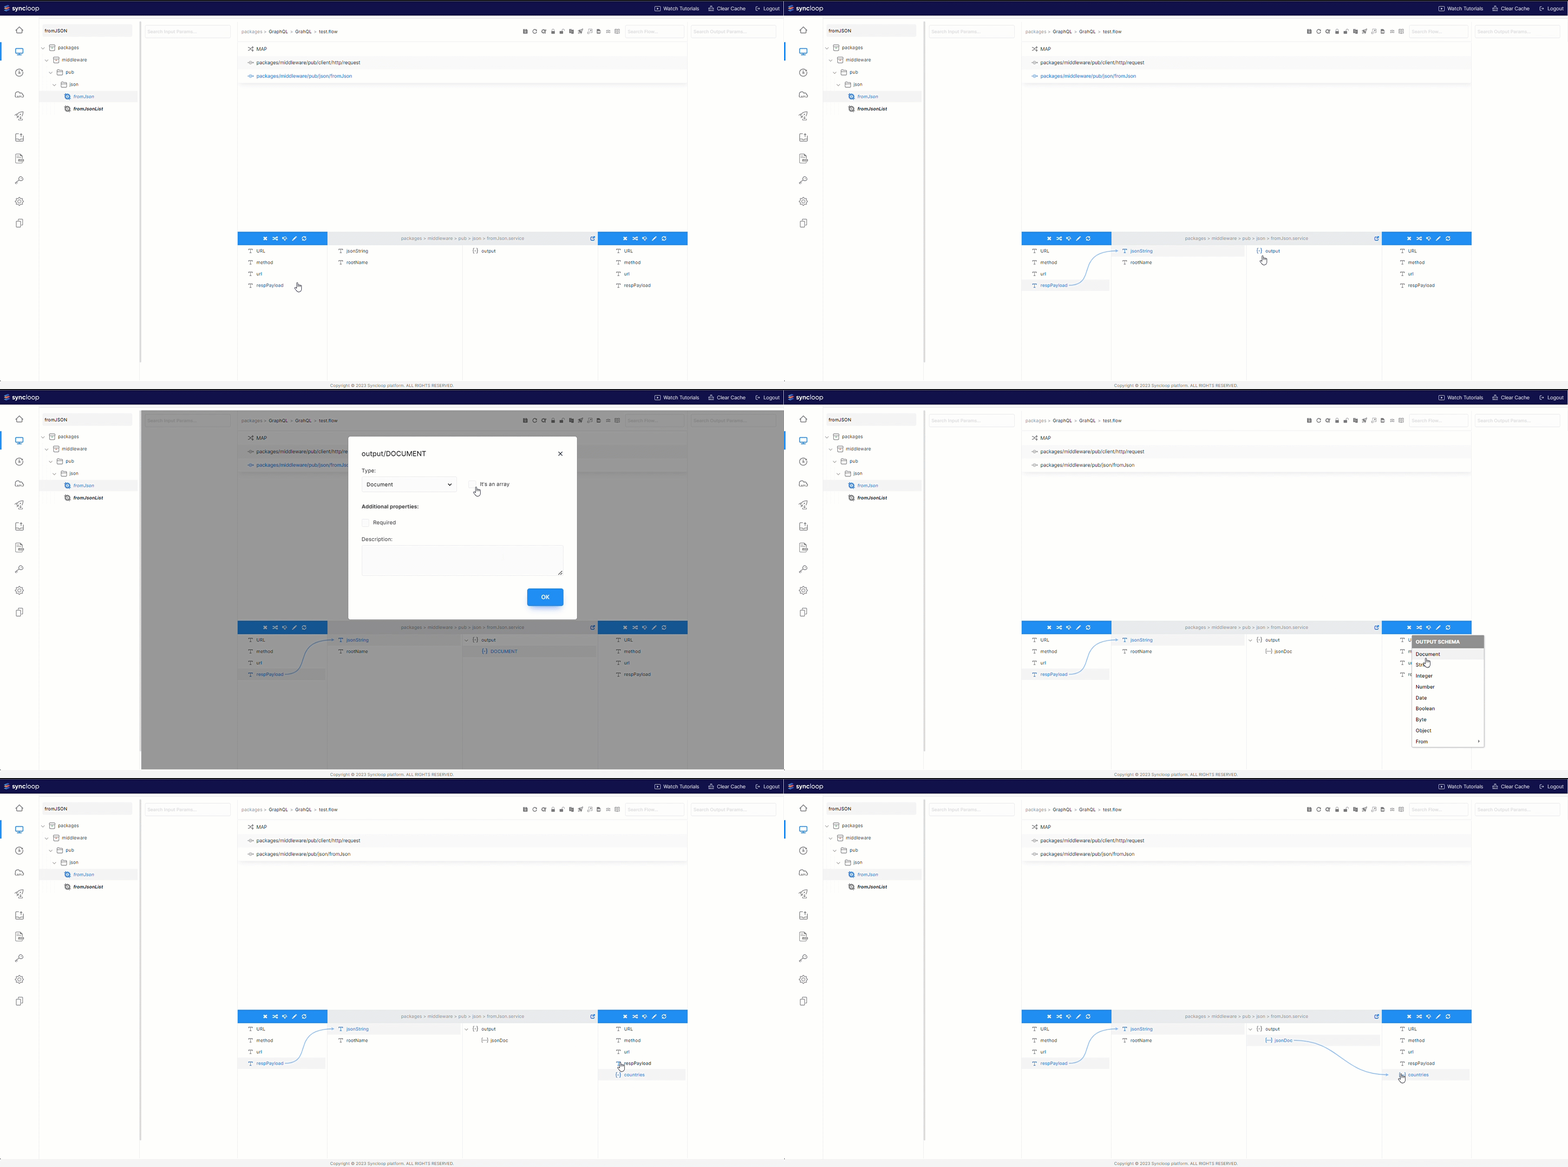
To create a new fromJson Service, follow these steps:
Right-click in the workspace and select Service from the context menu.
Navigate to the Packages section and search "fromJson" and select it.

Mapping the fromJson Service
Map the respPayload (Response Payload )to the
jsonStringfield.Under the
outputsection, create a new document calledjsonDoc. Additionally, create another document under theOUTPUT SCHEMAsection calledcountries.Map the content of
jsonDocto thecountriesdocument.Document Types
Both
jsonDocandcountriesshould be of typeArray.
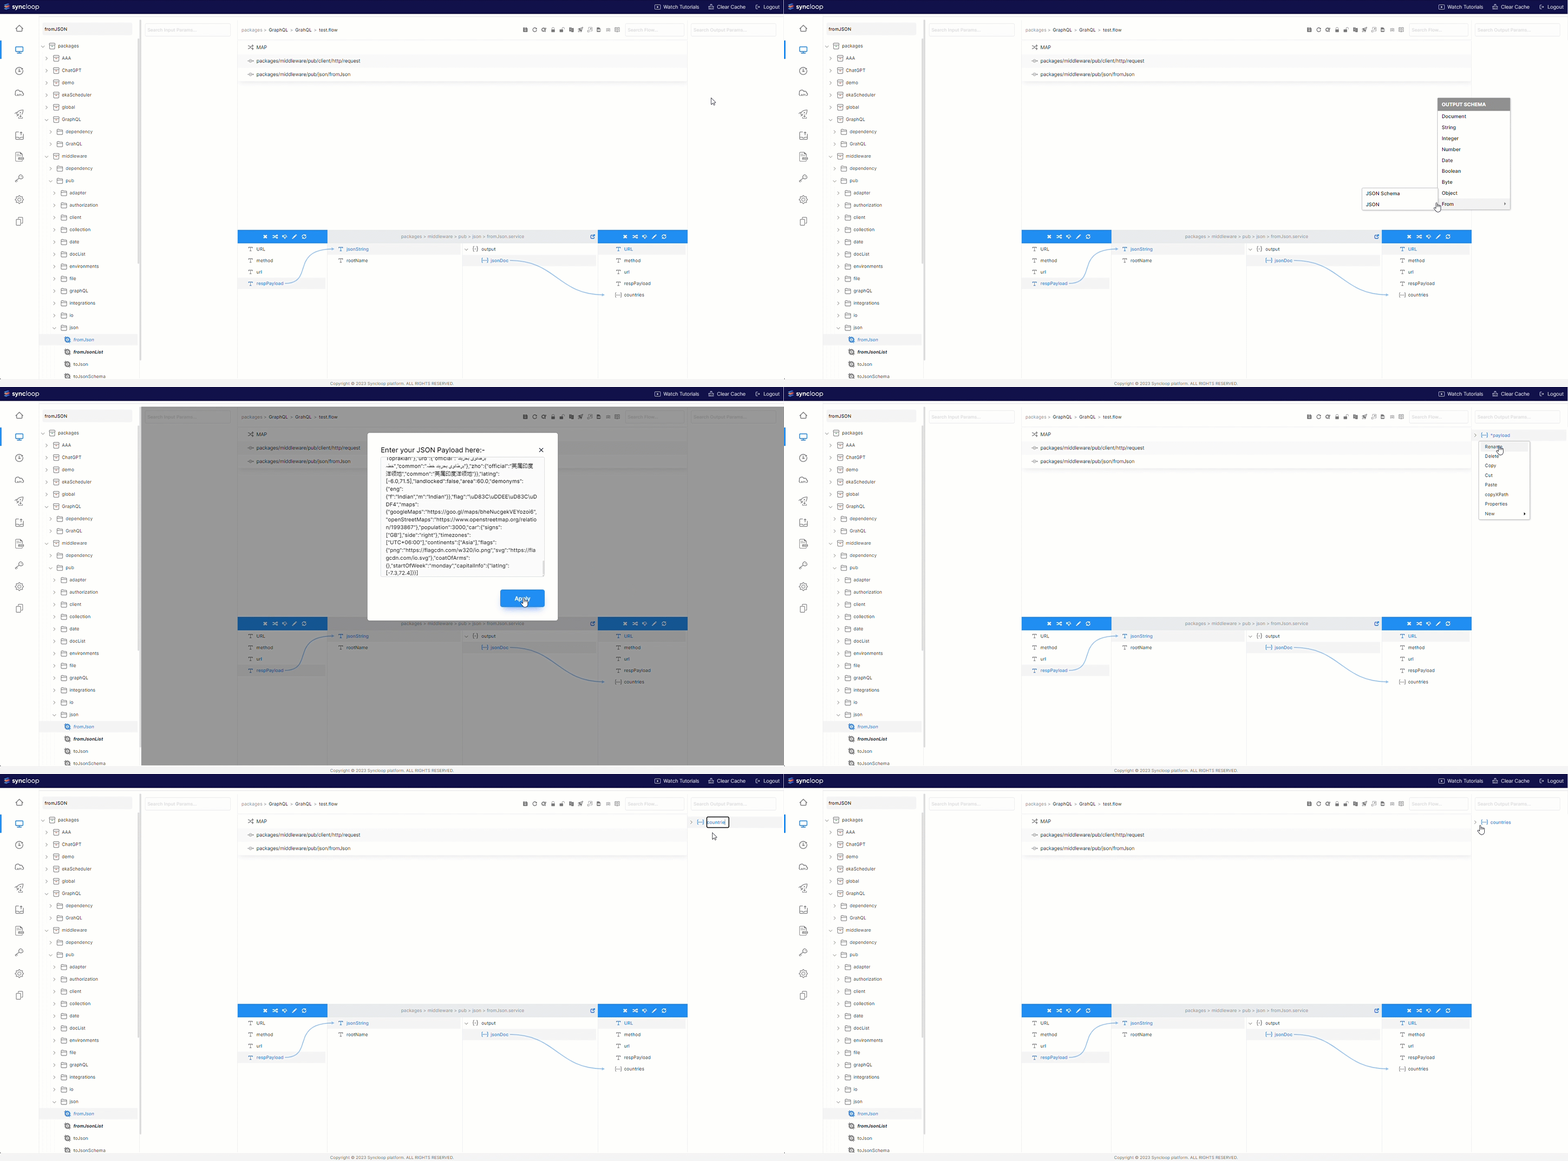
Creating a JSON Form
To create a JSON Form, follow these steps:
Navigate to the Output Parameters section on the left side of the Workspace.
Right-click in the Output Parameters section and select FORM from the context menu, then choose JSON.
Copy the desired payload into the form. For example, you can use the payload from the following API endpoint: https://restcountries.com/v3.1/name/india
Setting up the GraphQL
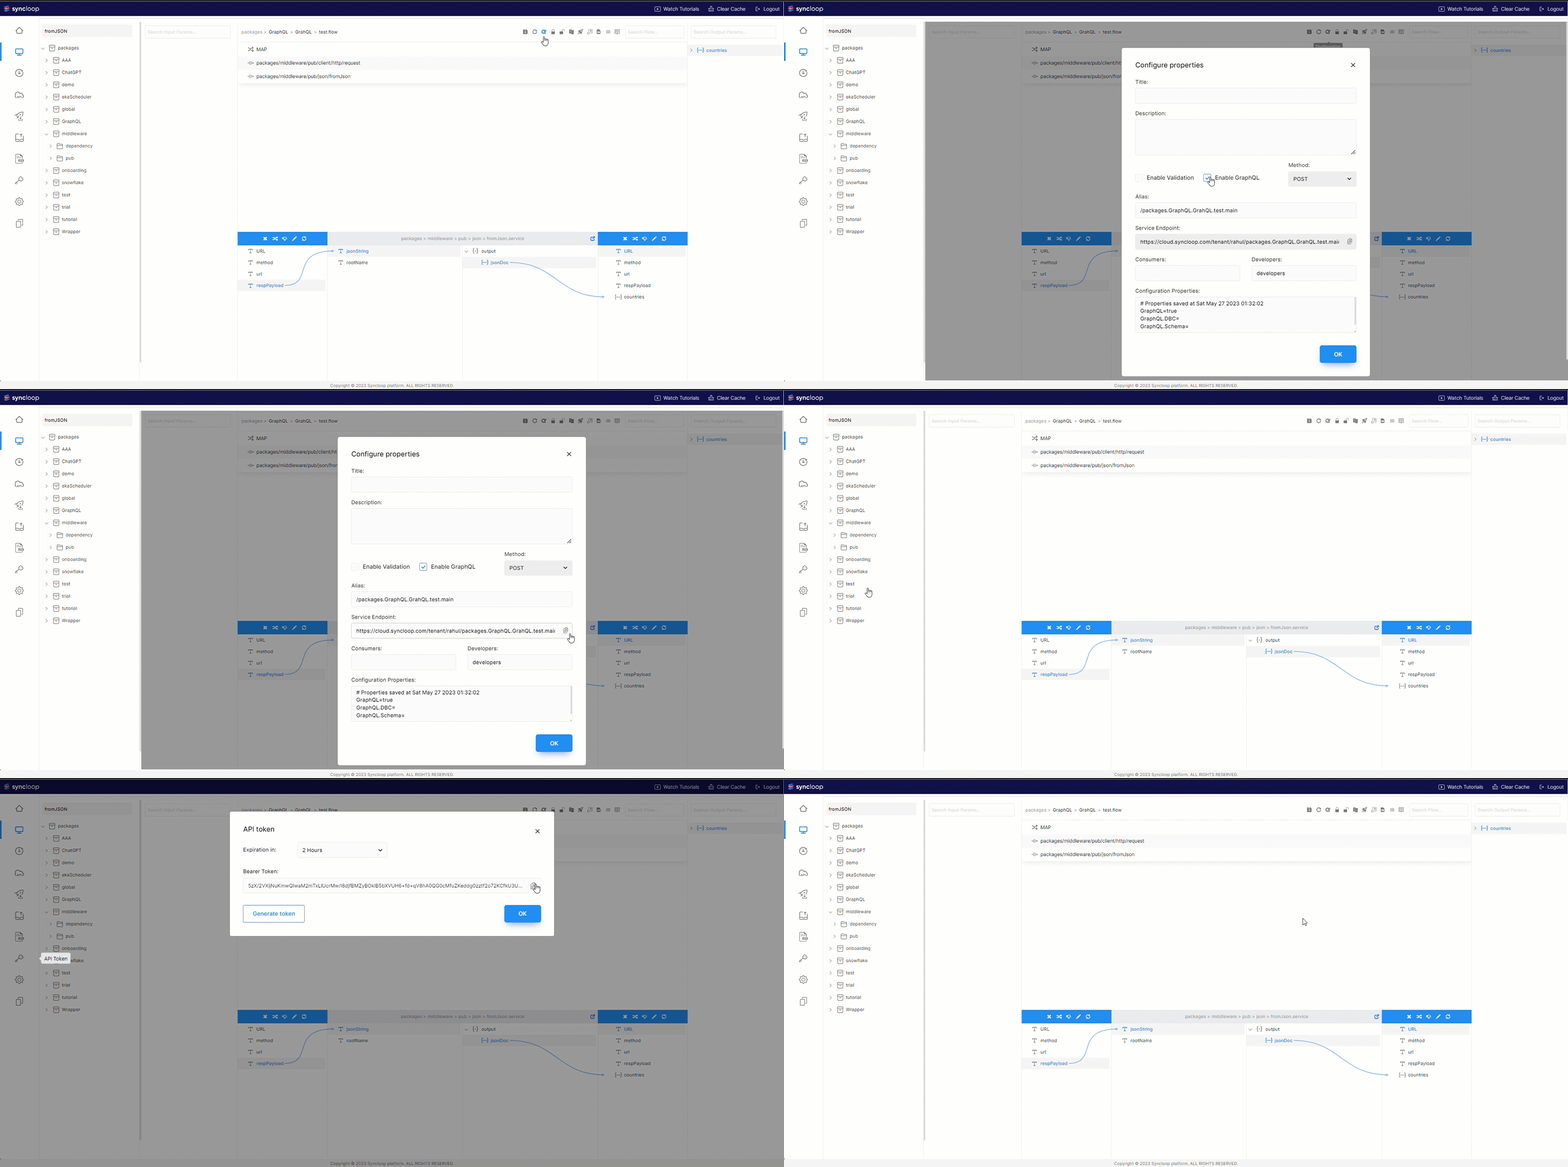
Enabling the GraphQL
To enable GraphQL, navigate to the configuration settings and check the "Enable GraphQL" option.
Service Endpoint and Bearer Token
Select Configuration ↦ Service Endpoint.
Copy the Service Endpoint.
Click on API Token in the left navigation bar. ↦ Bearer Token
Copy the Bearer Token
Congratulations on successfully setting up the external API implementation of GraphQL in the Syncloop Platform!
Now, let's move on to using Postman to test our workflow.
Testing Workflow
To Test the Workflow:
Paste the Service Endpoint URL and ensure that the HTTP method is set to POST.

Navigate to the AUTHORIZATION section and locate the BEARER TOKEN field and paste the TOKEN.
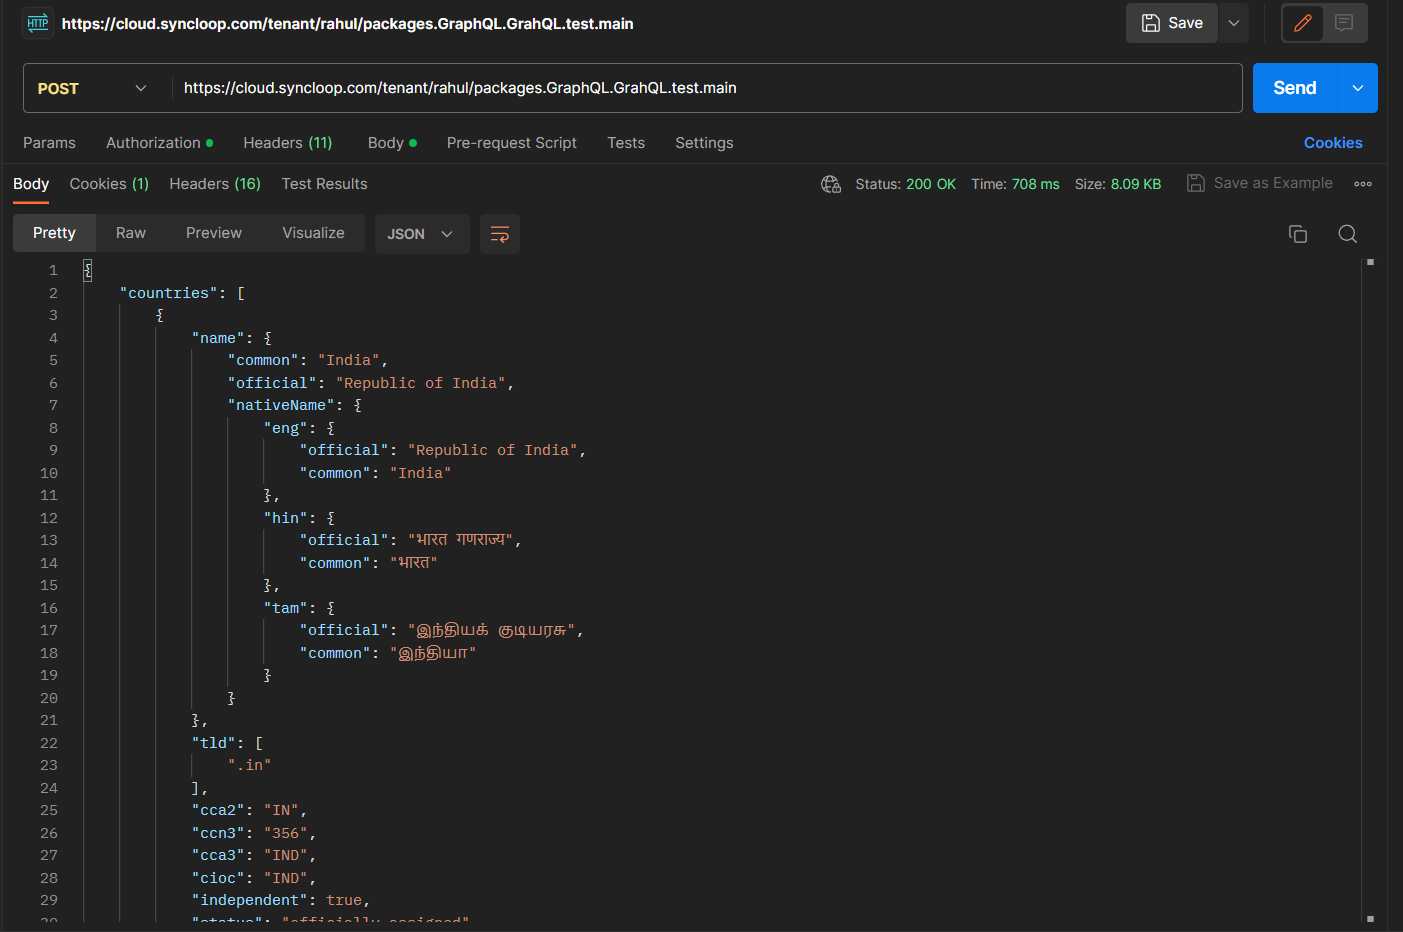
Finally, click on the SEND button to initiate the request and observe the workflow execution.
You will be presented with the following output:
To test the GraphQL functionality, please follow the steps below:
Navigate to the "BODY" section of the API request.
Locate the "GRAPHQL" field and click on it.
Paste the GraphQL query into the designated area. (In this query, we will be searching for the capital)
{
    countries {
        capital
    }
}
Now, click on the SEND button to initiate the request.
You will be presented with the following output:

Congratulations! You have successfully tested GraphQL by implementing an external API.
We hope you find this documentation helpful and user-friendly.